Struggling with Azure DevOps pull request merge conflicts? Learn how to resolve “edited in both” issues, fix conflicts preventing automatic merging, and handle merge conflicts directly in the browser or online. This step-by-step guide covers Azure DevOps merge conflict extensions, practical fixes, and proven workflows to resolve conflicts fast.
This guide covers every method to resolve merge conflicts in Azure DevOps pull requests — from the command line and Visual Studio all the way to the browser-based online editor — with real code examples, step-by-step instructions, and team best practices.
Table of Contents
Quick answer
git merge → commit and push. The merge button re-enables automatically once all conflicts are cleared.What Are Merge Conflicts in Azure DevOps Pull Requests?
A merge conflict occurs when two branches modify the same region of a file and Git cannot determine which version to keep. Azure DevOps surfaces conflicts at the pull request level — blocking the automatic merge until a developer manually resolves each conflict.
Why merge conflicts happen
Git is brilliant at merging changes automatically, but it draws a hard line when two people edit the same lines. Conflicts arise from:
- Two developers editing the same lines of a file on different branches.
- One branch deleting a file while another modifies it.
- One branch renaming or moving a file while another edits its content.
- Long-lived feature branches that have diverged significantly from main.
- Rebasing or cherry-picking commits that rewrite history.
Common scenarios: “edited in both” and “deleted vs modified”
Edited in both branches
config.js; Developer B also changes line 42 on their branch. Git can’t auto-pick.Deleted vs. modified
legacy.js; Branch B adds a new function to it. Git raises a conflict — should the file exist?Renamed vs. edited
utils.ts to helpers.ts; Branch B edits utils.ts. Git doesn’t know which path wins.Overlapping refactors
How Azure DevOps detects conflicts
When you open a pull request, Azure DevOps runs a merge simulation in the background using the same three-way merge algorithm as Git. It compares the common ancestor commit, the source branch HEAD, and the target branch HEAD. If Git cannot auto-merge any file, the PR is flagged and the merge button is disabled.
What you see in the Azure DevOps UI
Azure DevOps Conflicts Prevent Automatic Merging – Why It Happens
One of the most common questions developers search for is why Azure DevOps conflicts prevent automatic merging. The answer is fundamental to how Git works — but the UI error messages can make it confusing.

Understanding automatic merge failure
Git’s automatic merge only succeeds when changes are non-overlapping. If Developer A edits lines 10–15 of a file and Developer B edits lines 40–50 of the same file on a different branch, Git merges both sets of changes without complaint. The moment two changes touch the same lines or adjacent lines, Git inserts conflict markers and stops.
Azure DevOps inherits this behaviour and enforces it at the PR level, meaning: no merge until every marker is resolved.
Typical error messages explained
| Error phrase | Where it appears | Root cause |
|---|---|---|
conflicts prevent automatic merging | Azure DevOps PR banner | Overlapping edits on same lines |
Automatic merge failed | Terminal / git output | Git merge algorithm cannot reconcile |
CONFLICT (content) | Terminal after git merge | Both branches changed same file region |
CONFLICT (modify/delete) | Terminal after git merge | One branch deleted, other modified |
| Merge button disabled (grayed out) | Azure DevOps PR UI | Unresolved conflict markers remain |
When auto-merge is not possible
Auto-merge will never succeed when:
- The same lines have different content on both branches.
- A file was deleted on one branch and modified on another.
- A submodule pointer was updated differently on both branches.
- A binary file (image, PDF) was modified on both branches — Git has no text diff to apply.
Azure DevOps Pull Request Merge Conflict “Edited in Both” Explained
The label “Edited in both” is exactly what Azure DevOps shows next to a file in the conflict resolution panel. It means both the source branch and the target branch have changed that file, and Git has flagged at least one overlapping region.
What “edited in both” really means
When you see “Edited in both” it does not mean the entire file conflicts — it means at least one hunk (a contiguous block of changed lines) overlaps. Azure DevOps will show you only those specific regions inside the file editor, with conflict markers surrounding them.
Real example of conflicting changes
Suppose both branches changed the getTimeout() function in config.ts:
// Git inserts conflict markers around the conflicting hunk

<<<<<<< HEAD (target branch: main)
export function getTimeout(): number {
  return 5000; // 5 seconds — updated by Alice
}
=======
export function getTimeout(): number {
  return 8000; // 8 seconds — updated by Bob
}
>>>>>>> feature/bob-perf-tuning (source branch)

// Lines above and below the hunk merge cleanly — no marker needed thereCritical
<<<<<<<, =======, or >>>>>>> markers. These will cause build and runtime failures. Always verify all markers are removed before committing.How to decide which code to keep
Choosing the “winner” isn’t arbitrary — use these decision rules:
- Talk to the other developer. In most team environments, a quick message beats guessing.
- Check commit messages and PR descriptions for the intent of each change.
- Keep the most recent business requirement. If Alice’s 5-second timeout was a hotfix for production, keep it.
- Combine both changes when they serve different purposes — e.g., keep the new value but add a comment explaining why.
- Run the tests. After resolving, ensure the test suite passes before marking complete.
How to Resolve Merge Conflicts in Azure DevOps (Step-by-Step)
There are two primary paths to resolve merge conflicts in an Azure DevOps pull request: locally using Git (recommended for complex conflicts), or directly in the browser (fast for simple changes). This section covers the local approach.
Using Visual Studio / local Git
The local workflow gives you the full power of your IDE, your preferred merge tool, and your test suite. It is the recommended method for any conflict beyond a trivial one-line change.
Fetch the latest changes
Check out your source (feature) branch
Merge the target branch into your source branch
main) into your feature branch to surface conflicts locally.Edit each conflicting file
Stage the resolved files
git add to mark each conflict as resolved.Commit the merge and push
# Step 1 – fetch all remote branches
git fetch --all

# Step 2 – switch to your feature branch
git checkout feature/bob-perf-tuning

# Step 3 – merge the target branch into your branch
git merge origin/main
# OUTPUT: CONFLICT (content): Merge conflict in src/config.ts
# OUTPUT: Automatic merge failed; fix conflicts and then commit the result.

# Step 4 – see which files need attention
git status
# both modified: src/config.ts

# (edit src/config.ts in your editor, remove all <<<, ===, >>> markers)

# Step 5 – stage the resolved file
git add src/config.ts

# Step 6 – commit and push
git commit -m "fix: resolve merge conflict in config.ts — keep 8s timeout"
git push origin feature/bob-perf-tuningResolving conflicts manually in code
After running git merge, open each conflicting file and decide what the final code should look like. The goal is to produce clean, correct code — not simply to delete one side’s changes wholesale.
<<<<<<< HEAD
  return 5000;

=======
  return 8000;

>>>>>>> feature/bob-perf-tuningexport function getTimeout(): number {
return 8000; // Agreed with Alice — 8s required for new API response times
}Marking conflicts as resolved and committing
Once you’ve edited all files, git status should show no remaining “both modified” entries. Stage every resolved file with git add <file>, then commit. The commit message should briefly explain the resolution decision so your team has an audit trail.
Pro tip
git diff --check before committing to automatically detect any leftover conflict markers in staged files. It exits non-zero if any markers remain — great to add to your pre-commit hook.Resolve Merge Conflicts in Azure DevOps Browser (Online Method)
For straightforward conflicts, you can resolve merge conflicts in the Azure DevOps browser without cloning or installing anything. This is the fastest path for small conflicts — especially useful for documentation edits, config value changes, or when working on a machine without a local repo.
How to use the web editor
Open the Pull Request in Azure DevOps
Navigate to Repos → Pull requests and click the conflicting PR.
Click “Resolve conflicts”
The PR overview page shows a banner: “This branch has conflicts.” Click Resolve conflicts to open the online editor.
Select a conflicting file
The left panel lists all conflicting files. Click each one to load its diff view.
Use “Accept current”, “Accept incoming”, or edit manually
Azure DevOps gives you one-click options for each conflict hunk, or you can type directly in the editor pane.
Click “Accept merge” for each file
After resolving all hunks in a file, click Accept merge. Repeat for every conflicting file.
Commit the merge commit
Click Commit merge at the top. Azure DevOps creates a merge commit on your source branch and re-evaluates the PR — the merge button re-enables.
Editing conflicting files directly in browser
The browser editor shows a three-panel view: the source branch content on the left, the target branch content on the right, and the editable result pane at the bottom. You can click individual conflict hunks to accept one side, or type directly in the result pane to write a custom resolution.
Browser method scenario: Changing a version number in package.json
lodash version to 4.17.21; main bumped it to 4.17.20. This is a perfect browser-resolution case: click the incoming change (4.17.21), click Accept merge, commit. Done in under 60 seconds — no local clone needed. This is what azure devops resolve merge conflicts in browser is designed for.Pros and limitations of browser-based resolution
| Aspect | Browser (Online) | Local Git / IDE |
|---|---|---|
| Speed for simple conflicts | Fast | Slower setup |
| Run tests before committing | Not possible | Yes |
| Complex multi-file conflicts | Difficult | Recommended |
| Binary file conflicts | Not supported | Possible |
| Works without local install | Yes | No |
| Syntax highlighting | Basic | Full IDE support |
Azure DevOps Merge Conflict Extension – Do You Need It?
Azure DevOps has a rich extension marketplace. Several extensions and external tools enhance the conflict resolution workflow, though many teams find the built-in tooling sufficient.
Popular extensions and tools overview
| Tool / Extension | Type | Best for |
|---|---|---|
| VS Code GitLens | IDE extension | Rich inline blame, conflict history, side-by-side diffs |
| Visual Studio Merge Editor | IDE built-in | Three-way merge with .NET / C# project files |
| P4Merge | Standalone tool | Large binary/text files, visual 4-pane diff |
| IntelliJ / Rider Merge Tool | IDE built-in | JVM / .NET projects with smart AST-aware merging |
| Azure DevOps PR Insights | Marketplace extension | PR analytics, conflict trend reporting |
| Semantic Merge | Standalone tool | Language-aware merging — understands code structure |
When extensions help vs. when they’re not needed
Extensions are genuinely useful when you have frequent, complex conflicts across many files — for example, a mono-repo with deeply nested imports, or C# project files (.csproj) that tend to conflict on package references. For smaller teams with good branching discipline, the built-in Azure DevOps web editor and VS Code are more than enough.
Configure a custom merge tool
~/.gitconfig: [merge] tool = vscode and [mergetool "vscode"] cmd = code --wait $MERGED. Then run git mergetool to step through each conflict.Recommended setup for teams
- Small teams (1–5 devs): Built-in Azure DevOps web editor + VS Code with GitLens. No additional extensions needed.
- Mid-size teams (5–20 devs): Enforce a team-wide merge tool (VS Code or IDE built-in) via a shared
.gitconfig. Add branch policies to require up-to-date branches before PR completion. - Large teams / mono-repos: Invest in Semantic Merge or a custom merge driver for frequently-conflicting file types (e.g., lock files, auto-generated code).
Best Practices to Avoid Merge Conflicts in Azure DevOps
The best merge conflict is the one that never happens. These practices dramatically reduce conflict frequency on any Azure DevOps project.
Keep branches up to date
The longer a branch lives without pulling from main, the larger the divergence — and the more conflicts you’ll face. Establish a team norm: pull (or rebase) from main at least once per day on active feature branches.
# Option A – merge main into your branch (preserves history)
git fetch origin
git merge origin/main

# Option B – rebase onto main (linear, cleaner history)
git fetch origin
git rebase origin/main

# Azure DevOps branch policy: require branches to be up to date before merge
# Settings → Repos → Branches → Branch policies → "Require a minimum number of reviewers"
# + "Require branches to be up to date before merging" ✓Use smaller pull requests
Large PRs are conflict magnets. Every day a 2,000-line PR sits open, other developers are shipping code that might touch the same files. Aim for PRs under 400 lines of changed code where possible. Techniques to keep PRs small:
- Use feature flags to ship incomplete features safely to main.
- Split large features into a chain of stacked PRs, each building on the last.
- Separate refactoring commits from feature commits — submit the refactor first.
- Open draft PRs early to signal work-in-progress and coordinate with teammates.
Team collaboration strategies
Communicate file ownership
Branch naming conventions
feat/, fix/, refactor/ make it easy to spot potentially overlapping work before it starts.Enforce branch policies
Pair on risky refactors
Troubleshooting: Common Azure DevOps Merge Conflict Issues
Conflict still appears after resolving
PR still shows "conflicts" even after you committed the fix
git log --oneline -5 and confirm the merge commit is there. Then verify git push origin <your-branch> completed without error. If Azure DevOps still shows conflicts, click Resolve conflicts again — it will show “All conflicts resolved” once the push is detected.# Confirm you're on the right branch
git branch --show-current
# Confirm merge commit exists
git log --oneline -5
# Check for remaining conflict markers in staged files
git diff --check
# Verify remote is up to date
git log origin/feature/your-branch --oneline -3Pull request not updating
If the PR conflict banner persists despite a successful push, try these steps:
- Hard refresh the Azure DevOps PR page (Ctrl+Shift+R / Cmd+Shift+R).
- Scroll to the Files tab — if the new commit appears there, the PR has updated but the UI may be cached.
- Check the Commits tab to confirm your latest push is listed.
- If the PR uses auto-complete, re-enable it after pushing — resolving a conflict disables auto-complete as a safety measure.
Merge button disabled
The merge button in Azure DevOps stays disabled for several reasons beyond just unresolved conflicts:
| Reason | How to fix |
|---|---|
| Unresolved conflict markers remain | Remove all <<< markers, stage, commit, push |
| Required reviewers haven’t approved | Request review from the required approvers set in branch policy |
| Required build / CI pipeline failing | Fix failing tests or pipeline steps, let CI re-run and pass |
| Branch is not up to date with target | Merge or rebase from target branch, push again |
| Work items not linked (policy enforced) | Link the required work item(s) to the PR |
| Comment threads not resolved | Resolve all open review comments or mark them “Won’t fix” |
Branch policy override
Conclusion: Fastest Way to Resolve Azure DevOps Merge Conflicts
Quick recap
Merge conflicts in Azure DevOps pull requests are unavoidable in active codebases — but they’re always fixable. Here are the 7 fixes covered in this guide:
- Understand the conflict type (edited in both, delete/modify, rename/edit).
- Read the error message carefully to pinpoint the root cause.
- Resolve locally using
git merge+ your IDE for complex conflicts. - Resolve in browser using the Azure DevOps online editor for simple conflicts.
- Use a merge tool (GitLens, P4Merge, Semantic Merge) for difficult cases.
- Apply branch policies to prevent future conflicts (up-to-date requirement).
- Keep PRs small and branches fresh to minimize conflict surface area.
Recommended workflow
git fetch --all → git checkout feature/your-branchgit merge origin/main — surfaces all conflicts at once<<< / === / >>> markers, write the correct codegit add . → git commit → git push origin feature/your-branchKey takeaway
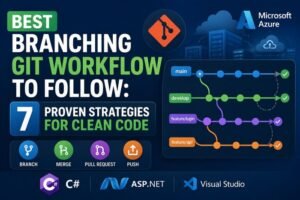
You might also find it helpful to read Best Branching Git Workflow to Follow: 7 Proven Strategies for Clean Code to learn how a solid branching strategy can prevent merge conflicts before they even happen.